How to properly check of host and some items availability.
In this article will be covered
- Availability monitoring by DNS name
- EXE monitoring
- HDD monitoring
- Forecasting function Timeleft

Did remember old soviet cartoon about python, elephant, monkey and parrot? Python wanted to know, how long he is. Monkey said python is 4/4 of python, but python disagree. Then they asked to parrot and parrot said python is 38,25 parrots long. Python was happy and now if I don't know what units to measure something I put in parrots or ppg.
Availability monitoring is required not from Zabbix server , but from host1-> host2:port
 In 2012 I ordered exe file to programmer , that exe just tried to ping port from host, by example SQL server available from web server. Nowadays you can just use Zabbix Net.tcp.service, just don’t forget units PPG. It appears net.tcp.service is available since version 2. Some people don't know that net.tcp.service can do remote ip and port checks too. In most cases it is enough, but actually it shows if port is open from particular host. You can add powershell check in Zabbix agent and get similar result. Add
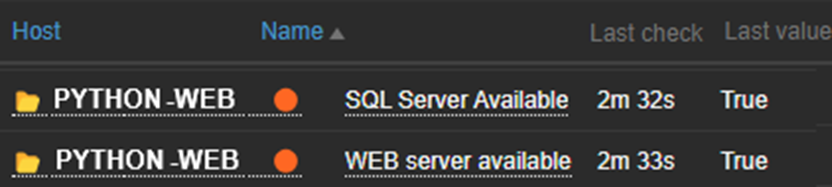
Parameter Quiet at the end returns only one word "True" or "False"
https://www.zabbix.com/documentation/4.0/en/manual/config/items/itemtypes/simple_checks It appears that net.tcp.service function can do DNS checks. I find it out just because I was preparing to presentation and double check all that I wrote., dont know when this feature appears but it works so all my previos job, sophsticated scripts, clever powershell scripts goes to trash. In documentation there is no reference to it, so maybe Zabbix guys don't know or forget. See the manual net.tcp.service[service,<ip>,<port>] https://www.zabbix.com/documentation/6.0/en/manual/appendix/items/supported_by_platform There are pointed <ip>, I just tried DNS for curiosity and it worked! As it is not documented checking by dns not sure if it disappears one day as it appeared.

Net.Tcp.Service.perf[tcp,python.yourdomain.com,443]
Zabbix do what? EXE file monitoring

Don't forget to Add Custom multiplier to get proper bytes.

True or False- Microsoft SQL eats all RAM? As you can see on picture there are 32 GB of RAM but Microsoft SQL does not pretend on more than 22 GB of RAM. He keeps what he get it but does not take more.

HDD monitoring

Some admins thinks they can install out of the box template and it will work fine. NO! If we show in dashboard only space usage we could get a wrong impression about volume space, as you can see there are alert Disk space is low >90% red line. Zabbix use dynamic (delta) view but if we dive deeper

to monitor together total space and used space we see, red line D disk is filling very slowly so we can leave it Admin overreacted by buying 300GB expensive DATACENTER storage In Azure it will cost You 1470$ in AWS 1008$. Check for Yourselves. https://azure.microsoft.com/en-us/pricing/details/managed-disks/ and https://aws.amazon.com/ebs/pricing/ In next saection I will explain how I calculated that my admin overreacted and disk will be full in 7 years.

Predictive functions
There are 2 predictive functions in Zabbix- Timeleft and Forecast. I am using only Timeleft.
Timeleft function dont always work fine, to get accurate data You need to keep data of disk usage for 6 month or more. I am using only 6 days of data because default templates out of the box, keeps only 7 days of data so to get more accurate data You have to change it.

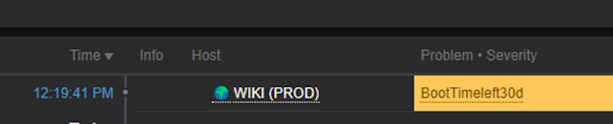
You can add some alert and get noted like this. Conclusion
To better monitor server availability
- Use DNS name check from remote host to port instead of IP from Zabbix server
- Use Timeleft instead of Disk almost full
- Use EXE file monitoring instead of service state
There are article and formulas that make my headache stronger.
https://www.zabbix.com/documentation/5.0/assets/en/manual/config/triggers/prediction_docs.pdf

You don't have to use formula I just made 2 templates You can use to work with timeleft and dns check. Here You find Windows Template to monitor EXE, DNS and TimeLeft and Linux template to check Timeleft for / /home and /root volumes.
https://github.com/giorsgeks/ZebbixTemplates/tree/main
https://github.com/giorsgeks/ZebbixTemplates/tree/main


